Friday, November 18, 2011

Blue Nude

Blue Nude: A NovelBlue Nude: A Novel by Elizabeth Rosner
My rating: 1 of 5 stars

This book was too slow-paced for me. I found the story wandered too much between (boring) current events to the past. I felt the lack of detail and symmetry to be a contrived way to build suspense that failed.

View all my reviews

Monday, November 14, 2011

Comebacks at Work

Comebacks at Work: Using Conversation to Master ConfrontationComebacks at Work: Using Conversation to Master Confrontation by Kathleen Kelley Reardon
My rating: 3 of 5 stars

I didn't finish this book. I found this book to be very logical, very explanatory, and what I did read has been helpful. I will probably be coming back to read this book again and give it the better review that it deserves.

View all my reviews

Friday, November 11, 2011

Pumpkin Banana Bread

After slaughtering The Diva's pumpkin and making puree... you might think that makes me a bad mom, but once you taste this bread, you'll understand why sacrifices had to be made. The original recipe called for 1/2 cup mashed banana and 1/4 cup vegetable oil. I'm not the kind of girl who measures mashed banana so I used one whole banana, 2 cups pumpkin puree and skipped the oil completely. It came out very dense and moist... and oh-so-delicious! Oh, a few other tweaks that I made: instead of orange zest I used dried orange peel (the stuff you buy in the spice aisle, not homemade) and I used half the original cloves because I don't really like cloves. If you like cloves then double the amount I have here.
nonstick cooking spray
2 cups all purpose flour
1-1/2 tsp baking powder
1 tsp ground cinnamon
1 tsp grated orange zest
1/2 tsp baking soda
1/2 tsp salt
1/2 tsp ground ginger
1/4 tsp ground cloves
1 15 oz can pumpkin (or 2 cups homemade puree)
2 large eggs
1 cup granulated sugar
1 mashed ripe banana
powdered sugar

Preheat oven to 350 degrees F. Spray a 9x5 inch loaf pan with nonstick cooking spray.

Stir together flour, baking powder, cinnamon, orange zest, baking soda, salt, ginger and cloves in a medium bowl.

Stir together pumpkin, eggs, sugar and banana in a large bowl. Stir flour mixture into pumpkin mixture just until combined.

Pour batter into prepared pan. Bake for 55 to 60 minutes or until a toothpick inserted near the center comes out clean.

Cool in pan on wire rack for 10 minutes; remove bread from pan and cool completely. If desired, sprinkle with powdered sugar. Slice bread and serve with Dark Chocolate Butter.

Found in last year's HyVee Seasons magazine.

Tuesday, November 8, 2011

Dark Chocolate Butter

This stuff is... yeah. What you don't see in the picture is my mouth waiting to pour this stuff in. For the purpose of pictures (and lack of patience) I did not refrigerate it. It does set up nicely once refrigerated. If it sticks around that long! The flavor wasn't a "dark" chocolate, more like "not as sweet" chocolate. I will probably be trying this with a dutch process cocoa for a darker flavor.

1/3 cup granulated sugar
1/4 cup baking cocoa
3 tbsp water
1/4 cup unsalted butter
1/4 tsp vanilla extract

In a small heavy saucepan, stir together sugar, cocoa and water until smooth. Add butter; cook and stir over medium low heat until bubbly. Reduce heat to low; cook, stirring constantly for 3 minutes. Remove from heat; stir in vanilla. Pour into a small bowl. Cool for 1 hour. Cover and refrigerate until serving time.

Found in last year's HyVee Seasons magazine.

Sunday, November 6, 2011

Homemade Pumpkin Puree

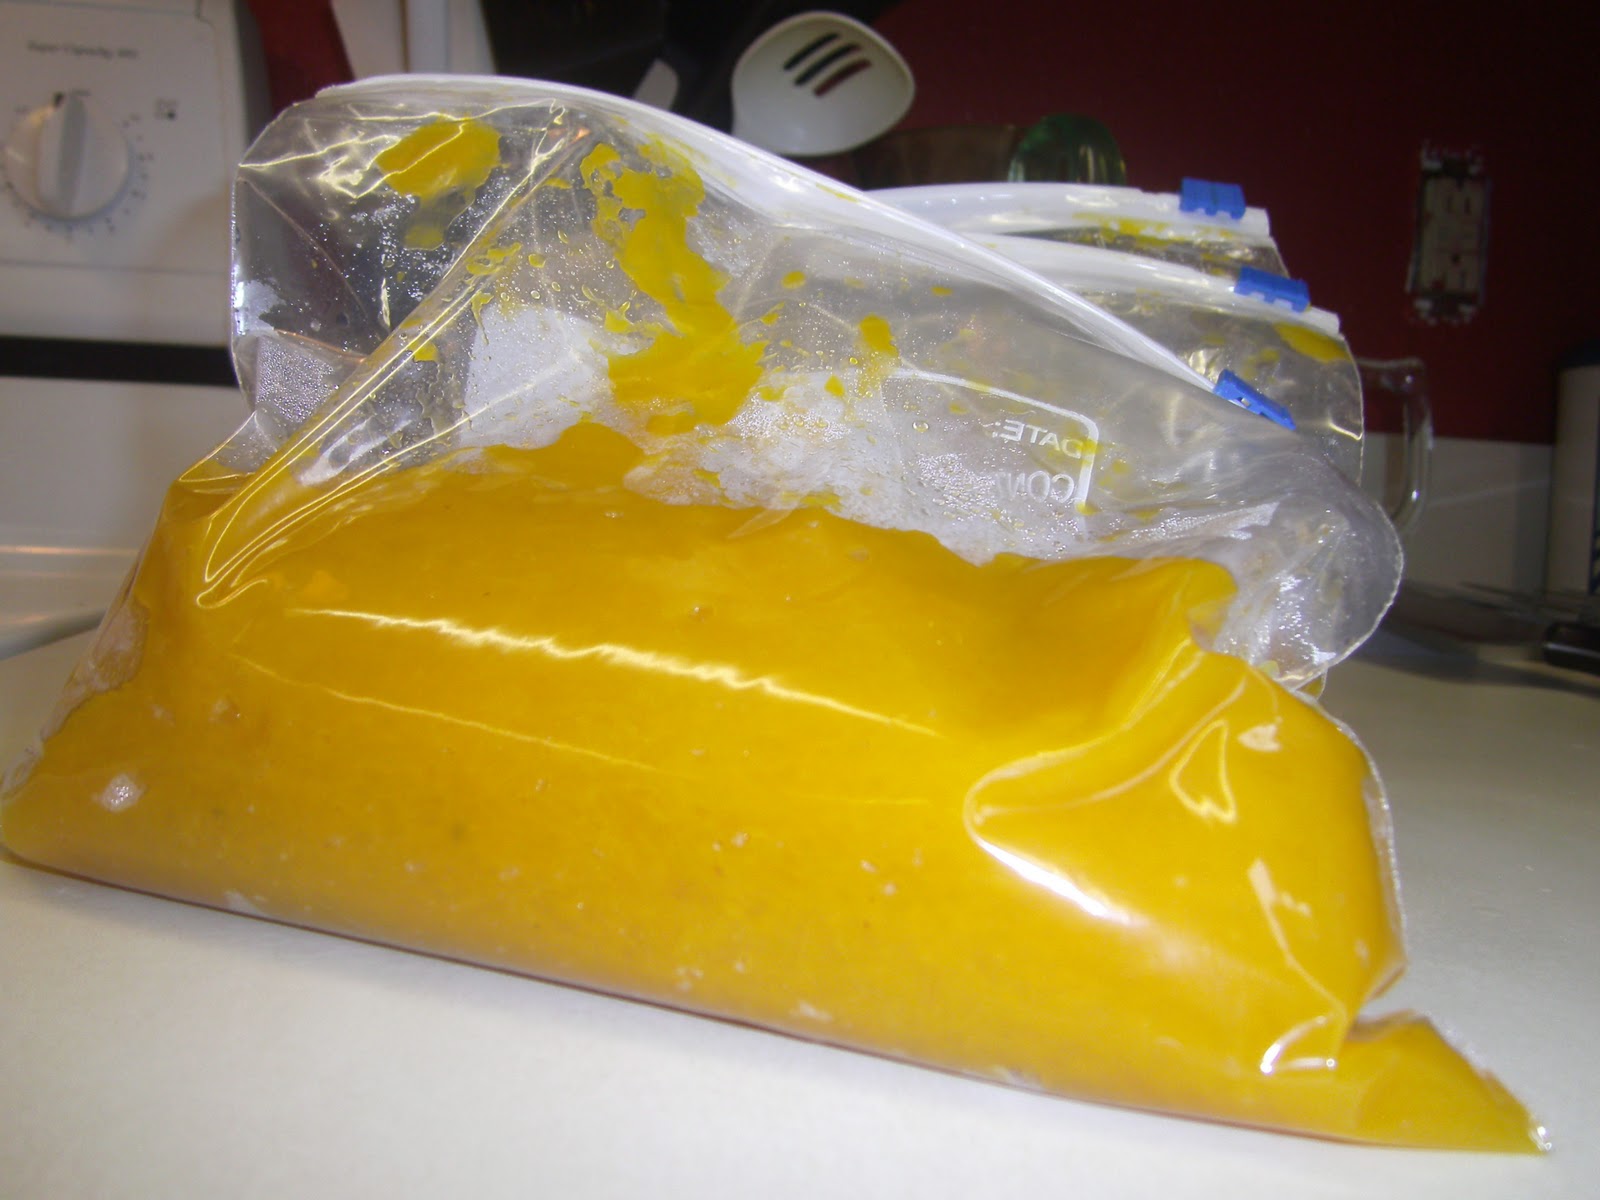
It's no secret around my house that I love anything pumpkin. I even had a plan idea this year to go through all of my pumpkin recipes and actually make them vs. just drooling over them. I planned to do this in October, but then was distracted by The Diva's birthday and the kitchen painting project (still unfinished). Surprisingly, I have never attempted to make my own puree. This year, I tackled that little project. It wasn't as hard as I thought it would be, just very time consuming.

Although canned pumpkin is prized for convenience, you might discover that the satisfaction of preparing your own pureed pumpkin is worth the effort. Though baking time and water content vary with pumpkin size and variety, any pumpkin can be seeded, baked and pureed for use in recipes calling for canned pumpkin. One pound of raw, untrimmed pumpkin yields about 1 cup of pureed pumpkin. When a recipe calls for a 15 oz. can of pumpkin, use 1-3/4 cups of puree; a 29 oz. can contains 3-1/2 cups.

Preheat oven to 350 degrees F. Cut a clean pumpkin (sugar pumpkins are recommended, I used the one my daughter painted at daycare - washed, of course) in half from stem end to the bottom. Scrape insides with a metal spoon to remove seeds and fibers, reserving seeds, if desired. Place halves, cut sides down, in a roasting pan. Add 1 cup of water. Bake for 60 to 75 minutes or until flesh is tender when pierced with a fork. [Note: I don't have a roasting pan large enough so I put each half in a 9x13 pan.]

When cool enough to handle, scoop out pumpkin flesh with a spoon, draining off any excess liquid and avoiding browned portions. Puree in blender or food processor or mash with potato masher until smooth. Place puree in a cheesecloth-lined sieve set over a deep bowl. Bring ends of cheesecloth over puree to cover. Place a 1 lb. can on top as a weight. Allow to drain about 1 hour or until puree is the consistency of solid pack canned pumpkin. (Or skip draining step and cook puree over low heat, stirring frequently, until any free water is evaporated.)

Place puree in 1-3/4 cup portions in freezer safe resealable pastic bags or containers, leaving 1/2 inch of headspace between the top of pumpkin and the top of bag seal or container rim for expansion during freezing. Seal, label, date and freeze for up to nine months. Thaw before using in recipes.

Saturday, October 29, 2011

The Happiness Project

The Happiness ProjectThe Happiness Project by Gretchen Rubin
My rating: 2 of 5 stars

I read this book expecting entertainment, not self-help, so it was hard to change my mindset while reading this book. There were some things that I really enjoyed about this author - that she was very black and white, she needed some way to track her progress and she was honest about her flaws. I liked that she told stories that were relevant to what was going on her life, although sometimes I felt she went on and on (beating a dead horse) about something that was "Okay, yeah, I got it the first time you said it" material. Overall, this book didn't do much for me.

Synopsis: Gretchen Rubin had an epiphany one rainy afternoon in the unlikeliest of places: a city bus. "The days are long, but the years are short," she realized. "Time is passing, and I'm not focusing enough on the things that really matter." In that moment, she decided to dedicate a year to her happiness project.

In this lively and compelling account of that year, Rubin carves out her place alongside the authors of bestselling memoirs such as Julie and Julia, The Year of Living Biblically, and Eat, Pray, Love. With humor and insight, she chronicles her adventures during the twelve months she spent test-driving the wisdom of the ages, current scientific research, and lessons from popular culture about how to be happier.

Rubin didn't have the option to uproot herself, nor did she really want to; instead she focused on improving her life as it was. Each month she tackled a new set of resolutions: give proofs of love, ask for help, find more fun, keep a gratitude notebook, forget about results. She immersed herself in principles set forth by all manner of experts, from Epicurus to Thoreau to Oprah to Martin Seligman to the Dalai Lama to see what worked for her—and what didn't.

Her conclusions are sometimes surprising—she finds that money can buy happiness, when spent wisely; that novelty and challenge are powerful sources of happiness; that "treating" yourself can make you feel worse; that venting bad feelings doesn't relieve them; that the very smallest of changes can make the biggest difference—and they range from the practical to the profound.

Recommended Reading:
The Book of Awesome by Neil Pasricha
Committed by Elizabeth Gilbert
Life is a Verb by Patti Digh
The Immortal Life of Henrietta... by Rebecca Skloot
Learning to Breathe by Priscilla Warner

Monday, October 24, 2011

Juice Box Robots

So... I thought I was being completely original. Actually, my intention was to make juice box and a candy grab bag for The Diva's birthday party at daycare... but then I wondered if I could make Tinkerbell juice boxes... and then my experimenting led to me thinking "these look more like robots" so then I talked to my best friend Google... and yeah. Not so original idea. But I did find a lot of ideas to make my not-so-original idea better. My favorite was found at My Insanity - I really liked the combination of chocolate and chewy candies, and the dots for eyes really made them cute. I left mine with their original packaging showing because 1) I'm lazy and b) it reminds me of the Lifesaver trains my mom used to make at Christmas (which reminds me, I should figure out how to do those...) These were a super-quick twenty minute project and the daycare kids loved them!

Here's what I used:
12 mini juice boxes (4oz. size) I bought these in packs of 4 at the dollar store in apple and fruit punch flavors
24 Hershey's milk chocolate nuggets
24 Laffy Taffys
24 Starbursts
24 mini dot labels I found these in the office supply aisle at Wal-Mart.

You'll also need a hot glue gun! I have a low temp one so the kids can help me when I tackle projects like this.

Glue two Starbursts to the bottom of the juice box for feet. I didn't worry too much about matching these, but next time I will take the time to match the feet and the arms. There were a few boxes that I had to play with to get to balance just right so they would still stand (there was one that I actually had to glue a third foot onto) but for the most part they all balanced perfectly after the feet were added.

Glue two Laffy Taffy on each side of juice box for arms. I did take the time to match these on each robot.

Glue two Nuggets with flat sides together. Glue to top of juice box to make the head.

Attach two mini dot labels to head for eyes (remember that the straw is the back of the robot body so you want the eyes to be facing the front).

Voila! I really like the varieties that Kendra came up with - different shapes for heads, Rolos for feet - but I think I'll stay away from the Pez arms. (Not because I don't like Pez, I just like Pez when it comes out of the Pez dispenser :) It's fun!)

Book Review: Shadow Baby by Alison McGhee

 Finished August 4, 2020 Book 11 of 20 Shadow Baby by Alison McGhee My rating: 1 of 5 stars I'm leaving this one unfinished, about h...